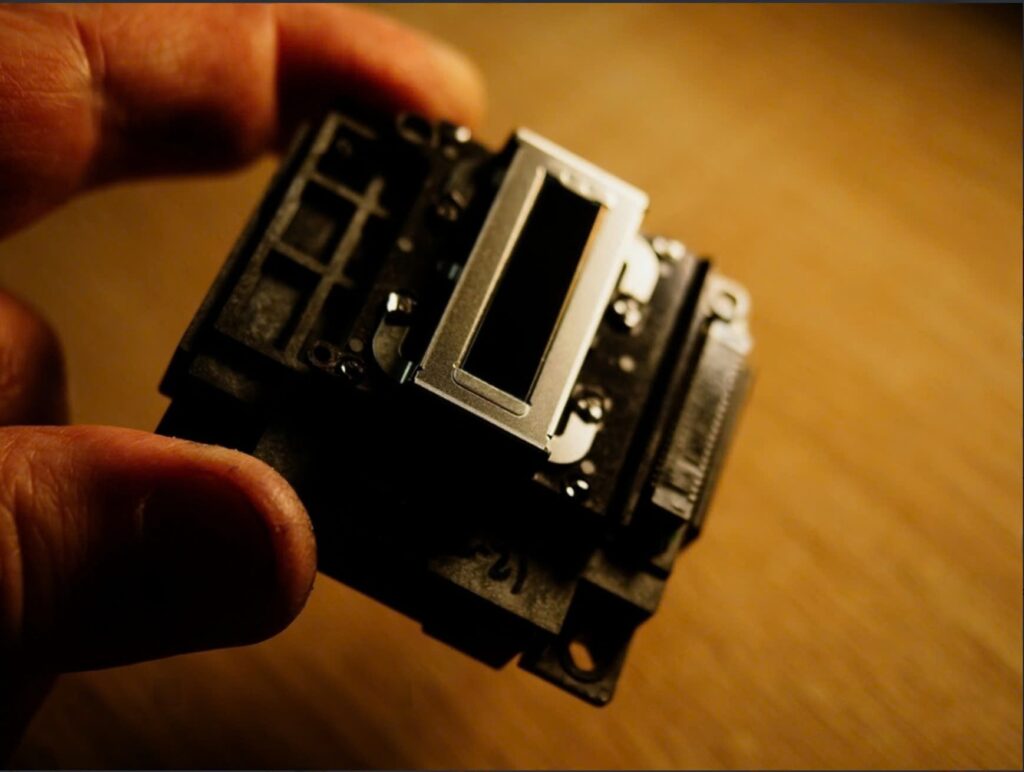
In the world of industrial textile printing, the print head is the heart of the operation. It is the most sophisticated, expensive, and delicate component of your machine. Yet, it is often the most neglected. Forgetting or improperly performing Direct-to-Fabric print head cleaning is not just a technical oversight; it’s a direct drain on your company’s finances.
Regular Direct-to-Fabric print head cleaning is crucial because it prevents clogged nozzles, which cause print defects and wasted ink from reprints. A clean head ensures accurate color, reduces system pressure, extends the component’s life, and lowers overall operating costs.
Every print job ruined by a clogged nozzle, every meter of fabric discarded due to color banding, and every drop of ink wasted on excessive cleaning cycles traces back to the health of your print heads. This guide will provide a detailed, strategic approach to Direct-to-Fabric print head cleaning, explaining not just how to do it, but why it is the single most effective way to save ink, reduce costs, and protect your investment.

The Cascade of Failures: What Happens When You Don’t Clean
To understand the importance of Direct-to-Fabric print head cleaning, you must understand the chain reaction that neglect triggers. It’s a predictable and costly sequence of events.
Problem #1: Wasted Ink and Materials
The most immediate consequence of a dirty print head is failed prints.
- The Cycle: A few clogged nozzles cause fine white lines (banding) in the print. The operator, trying to fix this, runs multiple “power clean” cycles, which consume a massive amount of ink. If the print is for a client, the entire piece is rejected. The job must be reprinted from scratch, wasting expensive fabric, more ink, and valuable production time. A single failed 10-meter run on high-quality fabric can represent hundreds of dollars in direct material loss.
Problem #2: Increased System Pressure and Component Wear
A clogged print head is like a blocked pipe; it forces the entire system to work harder.
- The Mechanics: To compensate for the blockage, the printer’s ink pump must generate higher pressure to try and force ink through. This constant strain leads to premature failure of the pump, dampers, and other components in the ink delivery system. Furthermore, this pressure can cause “delamination” of the print head’s nozzle plate, a catastrophic failure that requires immediate replacement. Proper Direct-to-Fabric print head cleaning avoids this unnecessary strain.
Problem #3: Compounding Technical Failures
A dirty print head doesn’t just affect itself; it endangers the entire machine.
- The Contamination: Dried ink and fabric lint can flake off a dirty head and fall onto critical components below. If this debris coats the encoder strip, the printer loses its ability to track the print head’s position, leading to distorted, misaligned prints. If it falls onto sensitive electronics or circuit boards, it can cause a short circuit, resulting in a devastating and expensive system-wide failure. This is why a simple task like Direct-to-Fabric print head cleaning can prevent a chain reaction of technical problems.
The 3 Pillars of Effective Print Head Cleaning
An effective strategy isn’t just about wiping the head; it’s a disciplined process built on three pillars.

Pillar #1: A Disciplined Cleaning Schedule
Proactive Direct-to-Fabric print head cleaning is always cheaper than reactive repair. Your Direct-to-Fabric print head cleaning schedule should be based on usage.
| Usage Level | Recommended Cleaning Schedule |
|---|---|
| Daily Use | Perform a light manual wipe-down of the head surface and capping station at the end of every shift. |
| Weekly | Perform a more thorough cleaning of the capping station, wiper blade, and the area around the print head carriage. |
| As Needed | After a head strike or when nozzle checks show persistent drop-out, perform a more intensive manual clean. |
Pillar #2: Using the Correct Tools and Solutions
Using the wrong tools can cause more damage than not cleaning at all. Your dedicated cleaning kit should include:
- Manufacturer-Approved Cleaning Fluid: This is non-negotiable. Each ink chemistry (Reactive, Pigment, etc.) requires a specific fluid.
- Lint-Free, Non-Abrasive Swabs: Specialized foam or polyester swabs are designed not to leave behind fibers.
- Protective Gear: Always wear powder-free nitrile gloves and safety glasses.
Why Not Water or Alcohol? Never use tap water, as its dissolved minerals will leave deposits on the nozzle plate. Isopropyl alcohol can be too harsh, potentially damaging the delicate anti-wetting coating on the print head’s surface. Following official OEM procedures is critical. A proper Direct-to-Fabric print head cleaning routine relies exclusively on approved materials to ensure you are protecting, not harming, your investment.
Pillar #3: Standardized Operator Training for Direct-to-Fabric print head cleaning.
The operator is the most critical element in any maintenance program.
- Do’s:
- Always wear gloves to prevent oils from your skin from contaminating the head.
- Use a gentle, single-direction wiping motion.
- Follow the documented procedure every single time.
- Don’ts:
- Never touch the nozzle plate directly with your fingers.
- Never apply excessive pressure when wiping.
- Never use sharp objects to try and “unclog” a nozzle.
Investing in proper training ensures that the daily Direct-to-Fabric print head cleaning protects your machine instead of inadvertently damaging it.
Step-by-Step Guide: How to Perform a Basic Manual Clean
This process should be adapted to your specific machine’s manual, but these principles are universal for a safe and effective Direct-to-Fabric print head cleaning.
- Safety Precautions First: Put on your protective gloves and eyewear. Ensure the room is well-ventilated. Power down the printer according to the manufacturer’s official procedure to prevent electrical damage.
- Run a Nozzle Check: Before cleaning, always print a nozzle check pattern. This gives you a “before” picture, identifying which specific heads or channels are clogged so you can focus your attention.
- Enter Maintenance Mode: Put the printer into its manual maintenance mode. This will unlock the print head carriage, allowing you to move it freely to access the heads and capping station.
- Prepare Your Tools: Take a new, clean, lint-free swab. Lightly dampen it with the approved cleaning fluid—it should be moist, not dripping wet. An oversaturated swab can cause fluid to run into the electronics.
- Clean the Capping Station and Wiper Blade: Gently wipe the rubber rim of the capping station to remove all ink gunk. A clean, airtight seal is vital. Then, carefully wipe the rubber wiper blade from top to bottom to remove built-up ink residue.
- Gently Wipe the Print Head Surface: With a fresh, dampened swab, wipe the surface of the print head in a single, smooth direction (e.g., from front to back, or from the center outwards). This prevents dragging debris from one nozzle area into another. Use a new swab for each pass.
- Run a Light Automatic Cleaning Cycle: After the manual clean, return the carriage to its home position, power the machine back on, and run one “Light Clean” cycle from the menu. This will re-prime the nozzles with fresh ink.
- Verify the Result: Print another nozzle check pattern. Compare the “after” picture to the “before.” If the nozzles are now clear, your Direct-to-Fabric print head cleaning was successful. If some clogs remain, you can repeat the process once more. If the problem persists, move to advanced troubleshooting.

Advanced Troubleshooting: When a Basic Clean Isn’t Enough for us to deal with Direct-to-Fabric print head cleaning
If stubborn clogs remain, a technician may use these methods. Warning: These are advanced procedures and can damage the head if done incorrectly for Direct-to-Fabric print head cleaning.
- The “Head Soak” or “Wet Capping” Method: This involves carefully filling the capping station with cleaning fluid and parking the print head on it for several hours or overnight. The prolonged contact helps dissolve hardened ink inside the nozzles. This must be done according to specific manufacturer instructions.
- Ultrasonic Cleaning: In severe cases, a technician may remove the print head entirely and place it in a professional ultrasonic cleaner with a specialized fluid. The high-frequency vibrations can dislodge internal debris. This is an expert-only procedure.
- Knowing When a Head is Beyond Saving: Sometimes, a head is permanently damaged. Signs include physical scratches on the nozzle plate from a head strike or internal delamination from excessive pressure. In these cases, no amount of cleaning will help, and the head must be replaced.
Conclusion: Shifting from Reactive Repair to Proactive Care
In industrial printing, uptime is profit. While the process of Direct-to-Fabric print head cleaning may seem like a minor chore, its impact is enormous. It is the single most effective action you can take to reduce ink and material waste, extend the life of your most expensive components, prevent catastrophic failures, and ensure your production line runs smoothly and without interruption. By treating Direct-to-Fabric print head cleaning as a strategic, cost-saving measure, you are actively protecting your business’s bottom line.
Expert Support for Your Print Head Maintenance
Do you want to implement a professional maintenance program? Let VieTextile help. We provide expert technical support, operator training, and the correct, manufacturer-approved supplies to ensure your Direct-to-Fabric print head cleaning is safe and effective.
Contact VieTextile today to learn more about our maintenance services and solutions.
FAQ
1. How do I know if a nozzle is clogged? The easiest way is to print the machine’s built-in “Nozzle Check” pattern. This will print a small pattern for each color channel. If there are any breaks or missing lines in the pattern, you have one or more clogged nozzles for Direct-to-Fabric print head cleaning.
2. What’s the difference between a “Light Clean” and a “Power Clean” cycle? A “Light Clean” uses a small amount of ink and suction to clear minor clogs. A “Power Clean” (or “Heavy Clean”) uses a large amount of ink and high pressure and should only be used for stubborn clogs, as it significantly fills the waste ink tank.
3. Can I unclog a print head that is completely blocked? Sometimes. If multiple automatic and gentle manual cleanings don’t work, you can try a “head soak” using the approved fluid. However, if the clog is due to physical damage or hardened ink from long-term neglect, the head will likely need to be replaced.
4. Is it safe to use third-party cleaning solutions to save money? It is highly discouraged. Third-party fluids are not formulated for your specific ink chemistry and can cause irreversible damage to the print head’s internal components and protective coatings, voiding your warranty and leading to much higher costs in the long run.
5. How does the print room environment affect the print heads? A hot, dry environment can cause ink to dry on the nozzle plate much faster, leading to more frequent clogs. Conversely, a very humid environment can sometimes affect the fabric’s ability to absorb ink correctly. Maintaining a stable environment with controlled temperature and humidity is recommended.
6. What is a “head strike” and can it be fixed by cleaning? A head strike is a physical collision between the print head and the fabric, often caused by a wrinkle or jam. This can scratch or dent the delicate nozzle plate. While cleaning can remove any resulting ink smears, it cannot fix the physical damage, which may have permanently destroyed some nozzles.